Track light fixtures: parts and terminology
A track light fixture can mean a complete head, a rail-mounted luminaire or an assembled lighting unit. Clarifying that term early helps buyers compare quotations that actually describe the same scope.
Review the buying questions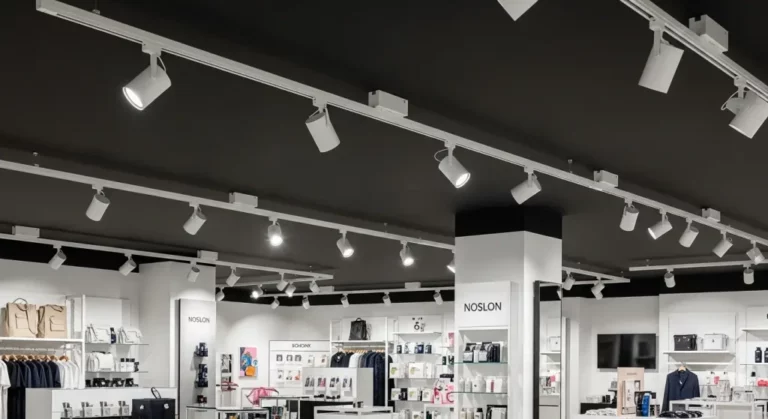
What a fixture includes
In everyday trade language, a fixture often includes the housing, electrical parts, light source arrangement and track adapter. Ask each supplier to identify the supplied assembly and any separately purchased lamp or control equipment. The scope of a fixture purchase should follow the supplied parts rather than a conversational label. A photograph may show an assembled light even when the commercial offer covers something narrower. An annotated parts list lets technical staff and buyers discuss the same package, making later comparisons clearer when lamp supply or external control equipment differs between competing offers.
Head versus rail
The head produces or directs light, while the rail supports it and provides the relevant electrical connection. Separate head quantities from rail lengths, feeds, connectors and mounting accessories in the purchase schedule.
Separating rails from heads also helps allocate installation responsibilities. The electrical entry point, mounting surface and connector locations belong to the track layout, while aiming and optical selection belong to the luminaires. A coordinated drawing can show both without collapsing them into an undifferentiated fixture allowance that leaves important connection or mounting items outside the purchasing discussion entirely.
Housing versus complete assembly
A housing is a structural enclosure and does not automatically include a finished electrical or optical assembly. Request a clear list of included parts when comparing a body purchase with a finished track head. An enclosure may look complete from the front while leaving important assembly tasks to the purchaser. Look at how the body opens, how components are held and where electrical connections are made. For an assembly order, those details shape the work remaining after delivery; for an installation order, they help clarify what the finished product description actually includes.
The adapter at the top
The adapter is the interface between the luminaire and the rail; similar-looking adapters can belong to different systems. Provide rail identification and verify the adapter against the exact track before treating the fixture as compatible.
The locking action and contact geometry deserve closer attention than the adapter's colour. Similar outlines can conceal meaningful differences at the interface with the rail. Keep spare heads identified by the system they belong to, and avoid using an apparent mechanical fit as the basis for an electrical decision when the correct pairing has not yet been established.
Joints and aiming hardware
A pivot or swivel joint lets a spotlight change direction, while the optic shapes the beam after that adjustment. Describe the intended aiming movement and check clearance around the fixture at its final position. Adjustment hardware needs room to move through its useful path, not merely space in the parked position. A ceiling obstruction can limit aiming before the joint reaches its apparent range. Looking at the body from the side while considering the target position helps reveal whether the selected form can direct light where it is needed after installation is complete.
Lamp and module vocabulary
A replaceable lamp and an integrated LED module create different maintenance tasks even when the outer fixtures look alike. Clarify the lamp base, module arrangement and service approach before using appearance as a buying shortcut.
Service planning starts with what the maintenance person will replace. A lamp change, an electrical component replacement and a complete head replacement involve different access and stocking decisions. Describe the intended approach in ordinary operational terms so a visually similar luminaire is assessed against the actual maintenance routine rather than assumed to behave like an existing familiar fitting.
Count the system accessories
Feeds, connectors, end pieces and suspension parts belong to the system schedule even when they are not called fixtures. Compare the scope of the full lighting assembly and identify who is supplying each accessory. Accessories are easier to miss when they disappear into a drawing's background. Trace the track from its electrical entry to each termination and mark every change of direction or mounting arrangement. This visual check connects the purchase list with the physical system and gives the installer a clearer basis for identifying components that belong in another party's supply scope.
Make fixture descriptions unambiguous
A practical line description ties the head type to the rail interface, light-source form and intended application. Use a marked photograph and a written inclusion list to resolve terms before comparing commercial offers.
Consistent vocabulary should survive the journey from enquiry to delivery check. A marked picture can identify the assembly being discussed, while a written description records its boundaries. Keep both attached to the same item reference so colleagues reviewing prices, technical details and packing information can recognise the intended fixture even when different departments habitually use different names for its parts.
Discuss track light fixtures: parts and terminology with Sampo
Describe the complete fixture you need to Sampo, including its mounting position, lamp arrangement and identified rail.
Ask Sampo about fit