Low-profile track lighting and flush looks
A low-profile appearance can make visible ceiling lighting feel less intrusive. Compare the complete installed assembly, including adapter and aiming position, rather than judging slimness from the rail alone.
Review the buying questions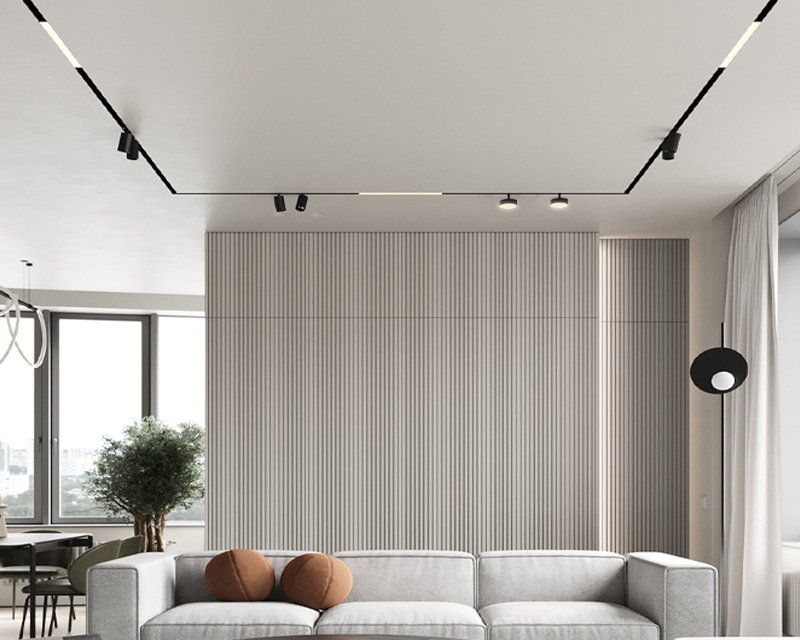
Define which part should look slim
A shallow rail, compact adapter and small head are separate aspects of the installed silhouette. Describe the viewing position and which component is visually sensitive. Describe the silhouette from the viewpoint that matters in the room. Someone entering through a doorway may notice the side of the adapter, while a seated person sees more of the head and optic. Naming that visual concern helps turn a vague request for slim equipment into a useful comparison of the assembled forms proposed for the project.
A flush look needs installation context
Surface-mounted and recessed-looking arrangements create different construction questions. Ask about the mounting method for the exact proposed system.
An apparently flush reference can depend on ceiling construction that is absent from a renovation. Identify whether the ceiling can be altered and how the supply will enter the system before using the image as a buying target. This gives the mounting discussion a realistic starting point and helps preserve a clean appearance within the actual scope of the building work.
Adapter height can be noticeable
The connection above a small head may contribute significantly to the total visible drop. Compare an assembled side view instead of separate catalogue photographs. Put the rail connection and head together in the same side view. The visible depth between them can change the overall impression even when each individual component appears compact. Compare the assembled outline at the proposed ceiling position, including any joint, rather than allowing separate product photographs to create an impression that cannot be reproduced by the complete installation.
Keep the lighting task intact
Smaller visible equipment still needs to deliver an appropriate beam to its intended target. Request the optical and adjustment details rather than selecting only by body profile.
Begin with the target surface and the intended viewing position, then assess compact bodies that can serve that role. A smaller enclosure is useful only when the proposed head still suits the application. Request the relevant optical information and examine adjustment in context, so that reducing visible hardware does not replace the lighting purpose as the main selection criterion.
Slim tracks and surrounding details
Ceiling beams, coving and nearby services can make a small lighting line appear either coordinated or arbitrary. Align the proposed route with the room's existing geometry. Existing ceiling details provide a scale against which a slim rail will be judged. Show coving, beams, access panels and nearby services on the layout rather than placing the lighting line on an otherwise empty plan. A restrained installation can then relate to actual architectural features and the objects it serves, instead of relying on the body profile alone for visual order.
Aiming changes the silhouette
A head that looks shallow when straight may project further once aimed. Review the body at the direction needed for the actual surface.
Photograph or sketch a candidate head in the direction required by the display. Rotation can expose the side of the body or move the optic farther into view, changing the quiet outline seen in a straight product image. Assess this installed position from the entrance and main seats before concluding that a particular shape will look discreet in the room.
Service access is still needed
A compact assembly should be assessed for lamp or component access alongside its appearance. Ask how the selected head is maintained in its installed position. Ask about the service movement around the installed head, not simply how the product opens on a workbench. Ceiling obstructions and closely spaced equipment can reduce room for handling components. The desired compact appearance should therefore be considered alongside access to the parts that require attention, using the same mounting position that appears in the proposed room layout and enquiry drawings.
A low-profile enquiry with useful detail
A practical request combines the desired visual character, ceiling construction, target layout and rail details. Send side-view references and ask about an appropriate available head.
Attach an assembled side reference and identify what should remain visually quiet: the rail, adapter, body or entire line. Include ceiling constraints and target positions so the proposal can be judged in context. This creates a practical comparison between available equipment while giving Sampo room to discuss a suitable arrangement rather than infer specifications from the phrase low profile.
Discuss low-profile track lighting and flush looks with Sampo
Attach the available clearance and required aiming direction to your Sampo enquiry, alongside the rail and adapter information.
Ask Sampo about fit